To get the "Setup Ramp", you need to be wearing the Driving HUD and seated as a driver in the car. The HUD needs to be 'synchronized' (connected) with the car. Simply click the Setup Button ( @ ) and the ramp should load under the car.
If it does not load, then the most likely reason is the property you are on does not allow scripts and/or object to be rezzed. Simply move to a parcel which does and retry.
Once the ramp loads the car physics will be disabled - so you cannot fall off the ramp, and you will be able to make use of all the setup tools to override the parameters on your car.
The Ramp has a few overriders included. These are used to override parameters on the vehicle. In all cases, adjustments are applied to the vehicle instantly. In SL physics there is limited ability to script the complex performance conditions of vehicles, but we manage to get some effect.
The following is a brief summary of each item :
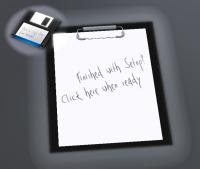
Clipboard and Diskette
The Clipboard is used to complete the setup options. Click the Clipboard to bring up a menu.
Menu options are :
Help/Info : Gives you a link to this page
IM Settings : Allows you to have the current settings IM'd to you (will appear in your Chat window). You can copy these settings and save them to a NoteCard file which you should name appropriately. You can use that Notecard file to quickly load the same settings at a later date.
Tip : These Notecards can also be transferred to other users to setup their vehicle with the same setup.
DelScript : This utility is for purists who would liek to reduce the scripts in the vehicle to improve region performance. More info here.
Finished : Select this option once you are done with the setup. The ramp will be removed and physics re-enabled so you can enjoy driving your vehicle.
The Diskette is used to LOAD (restore) settings from a previously saved notecard. When you touch the diskette a Document Scanner will be rezzed nearby.
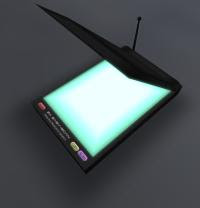
Hold in CTRL key and drag and drop a Notecard containing settings from your inventory onto the scanner. Once it recognises the document, confirm you wish to load the settings by touching the scanner.
Once you do that, the setting should be uploaded into your vehicle, and you should get a confirmation message.
Note: The scanner is only displayed for about 1 minute. If it disappears before you have a chance to drag the Notecard, simply touch the diskette again for another.
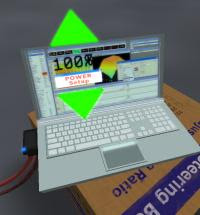
POWER Setup
The Power is setup by overriding the on-board CPU using a laptop.
You can adjust the Power override between 30% and 200% of standard Power.
Use the large green 3D arrows to adjust the Power up or down.
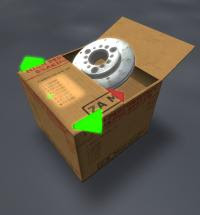
Braking Override
More important than Power is the Braking Power. Use this tool to override the Braking ability of the vehicle by replacing the Brake Disc system.
Some drivers prefer a slower braking effect as they also brake using the gears, while others prefer sharper braking.
Touch the large green 3D arrows to adjust the grade of brakes used in your setup - up to CM280 (ultimate) braking power.
Steering Ratio
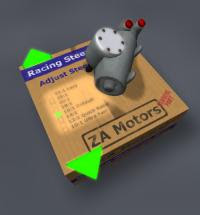
Our steering system always has been more advanced than most SL vehicles. We've always had dynamically progressive steering (which changes the steering ratio depending on speed), as well as high speed digital (bump) steering - so you don't roll your car at high speeds when you just want to make a slight directional change.
We also allowed 'tweaking' of the steering ratio previously, but now we also allow overriding of under/oversteer effect (see next item).
This steering ratio adjustment is similar to our previous steering 'tweaking' (with a bit more scale), and allows you to override the normal steering effect between 'Lazy' (32:1 Steering ratio) and Ultra Fast (10:1) by replacing the Steering-box ... actually you can go down to 8:1 - but that's really tight.
UnderSteer / OverSteer
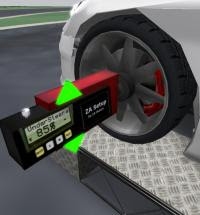
We now allow adjustment of Under / Oversteer effect.
Understeer is the effect whereby a vehicles cornering path radius is greater than the radius indicated by its wheel direction ... ie - the front wheels have the effect of 'slipping' and the vehicle tends to take the corner wider than it should. Oversteer is the opposite - where the back-end tends to 'swing-out' around the corner.
Using the large green 3D arrows you can adjust More Oversteer (up) or more Understeer (down) by adjusting alignment.
Down-Force Override
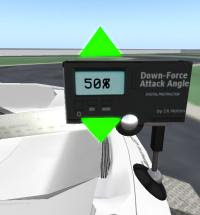
We have the ability to override the effective down-force (DF) on the vehicle.
To illustrate this with a modifier, we have an instrument changing the apparent aerodynamic attack angle of the rear-wing.
Increase the % factor for more downforce, and decrease for less. Note that a lot of downforce may have a small effect on the top-end speed of the vehicle (as there's an aerodynamic loss as well as more rolling resistance).
Enjoy
Zab


No comments:
Post a Comment